
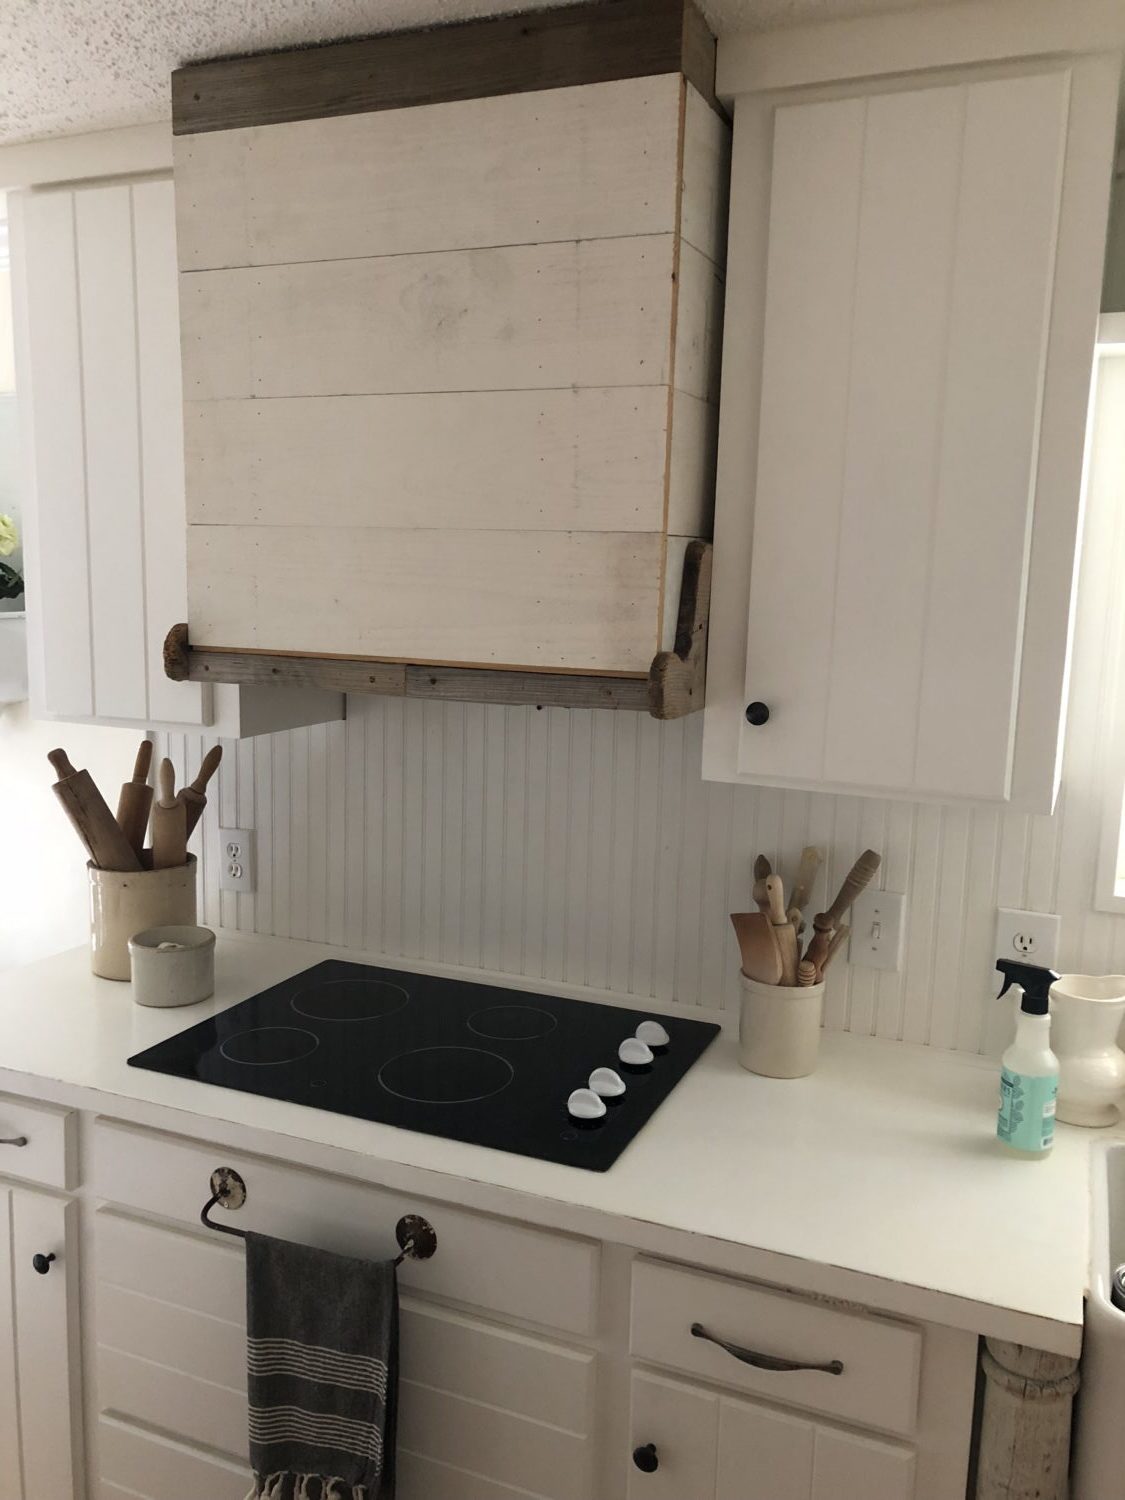
Custom Shiplap Vent Hood
We built another vent hood! My husband so patiently worked with me until he made my vision come to life!
(Please promise you’ll ignore the popcorn ceilings in all the photos…hopefully we’ll be able to get rid of those soon)
I know what you’re thinking…why would we want to change it up? Well, we built our first custom vent hood in 2012, when we did our kitchen remodel. And we did love it for many years. But you know, sometimes you just want a new look…a refresh. And, my husband is such a great carpenter…usually if I have a design idea swirling around in my head, he can make it happen. You know, we love repurposing items we already have, and this project was no different. So, I wanted to use shiplap, along with some unique reclaimed wood. We already had shiplap leftover from our booth in Canton.
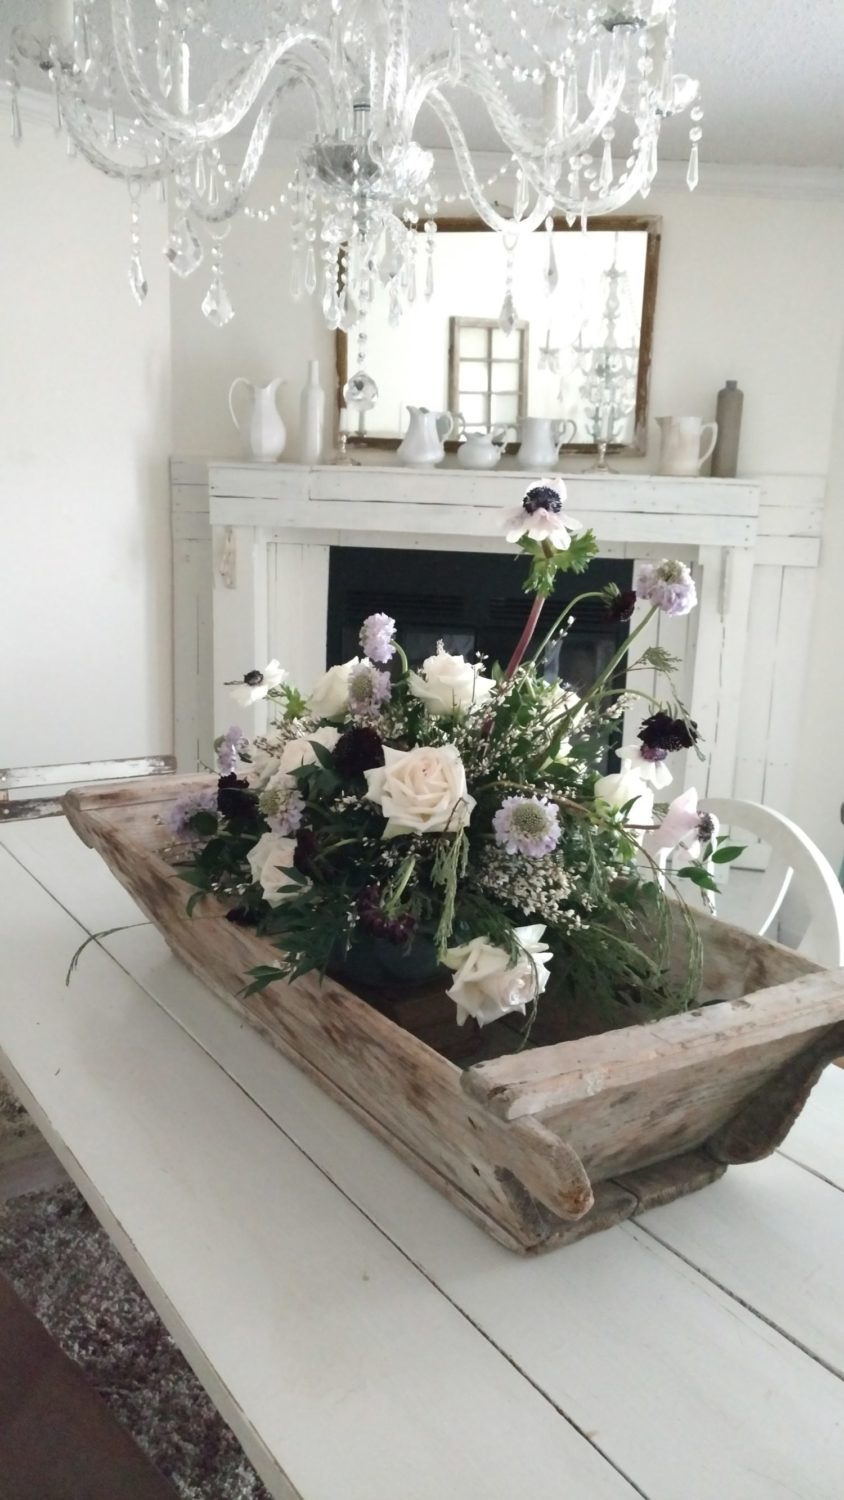
Then an idea struck, what about taking apart this vintage trough we bought from Southeastern Salvage a few years ago? We could use the wood as a unique trim for the vent hood. After all, I was going for a French country farmhouse style. So it was decided, we’d use what we had and see what we could create!
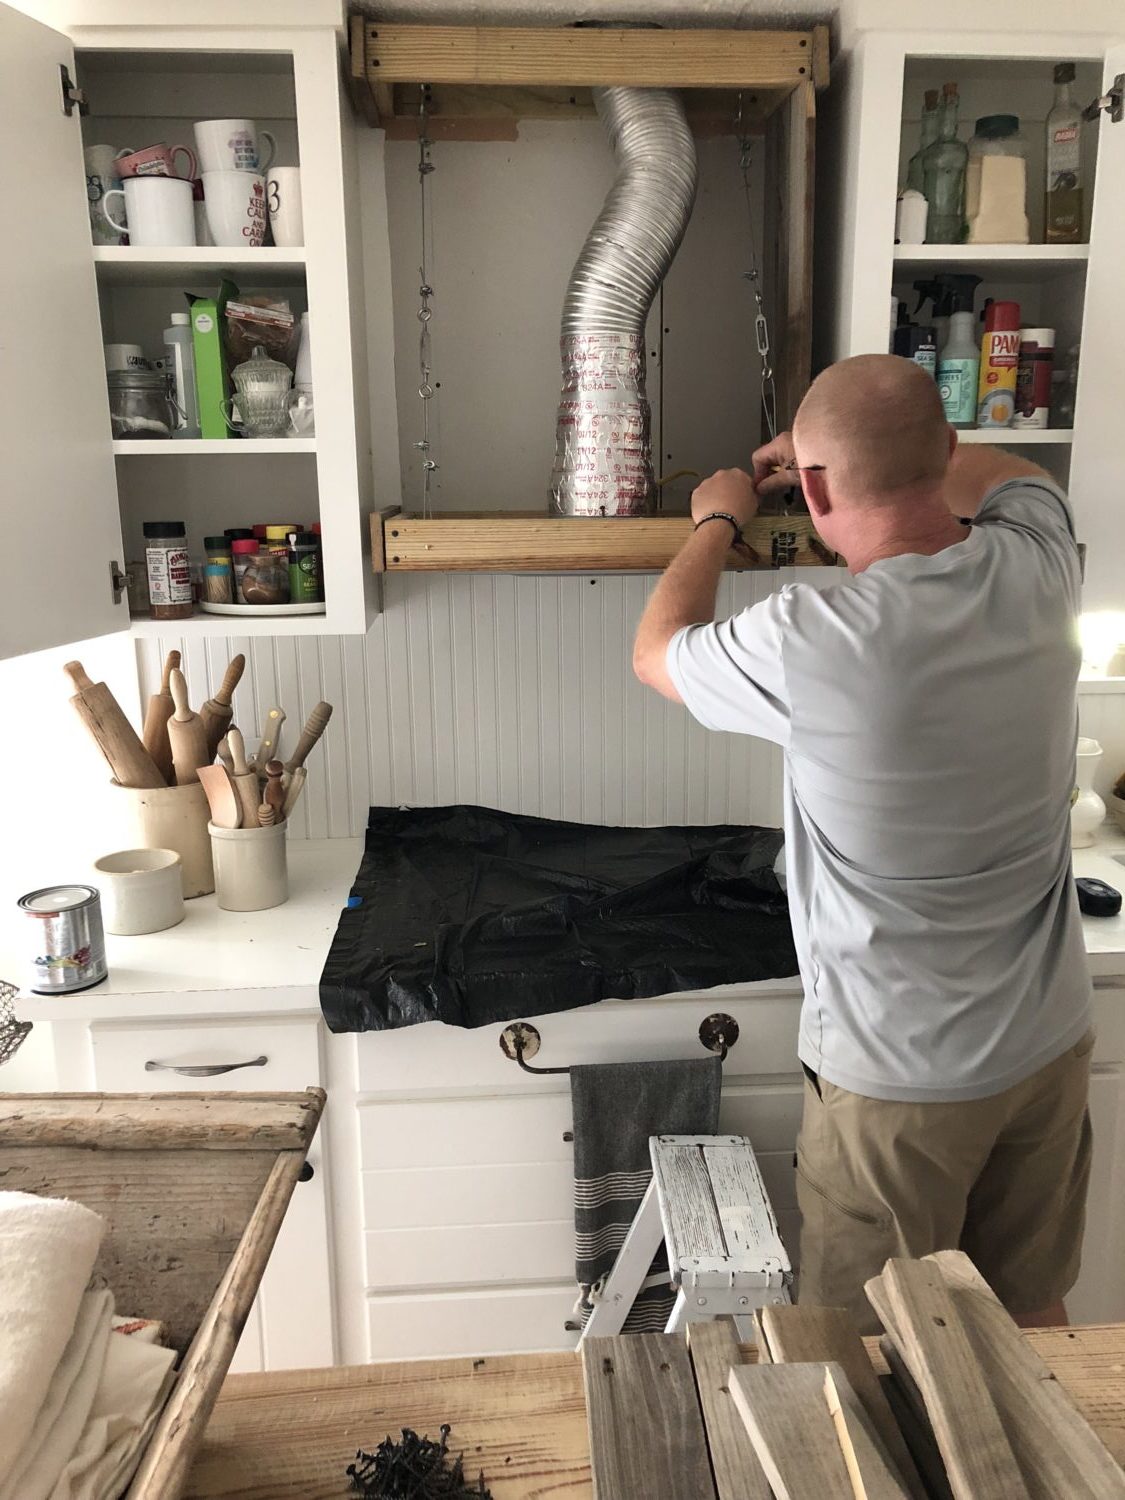
First, we took apart the old vent hood…all the wooden slats came down. It was great to be able to use a few of these for the structure, too. No new wood needed!
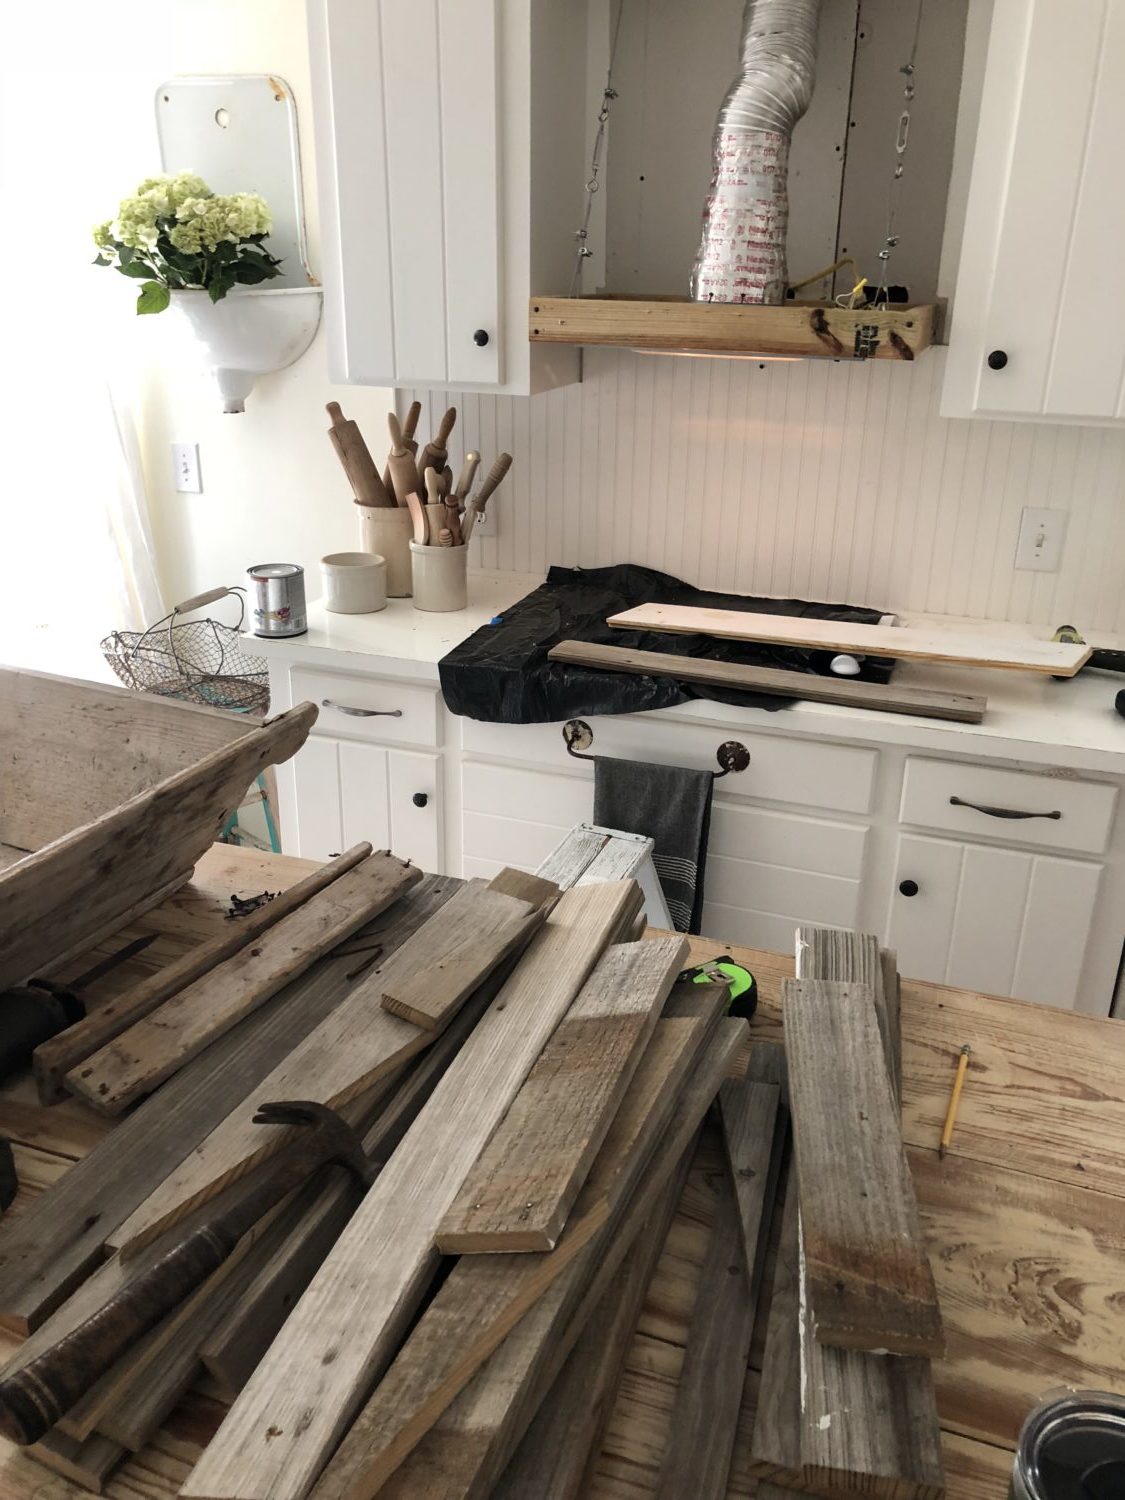
My husband, Shannon, made sure the existing vent wire connections were still safely in tact. The wire pulley system you see below was really not needed. We installed those the first time because our ceiling is slanted, and we thought it would provide more support. Turns out, all you need to build is a box structure to attach the slats. However, it didn’t hurt to just leave this in place, so we built around it.
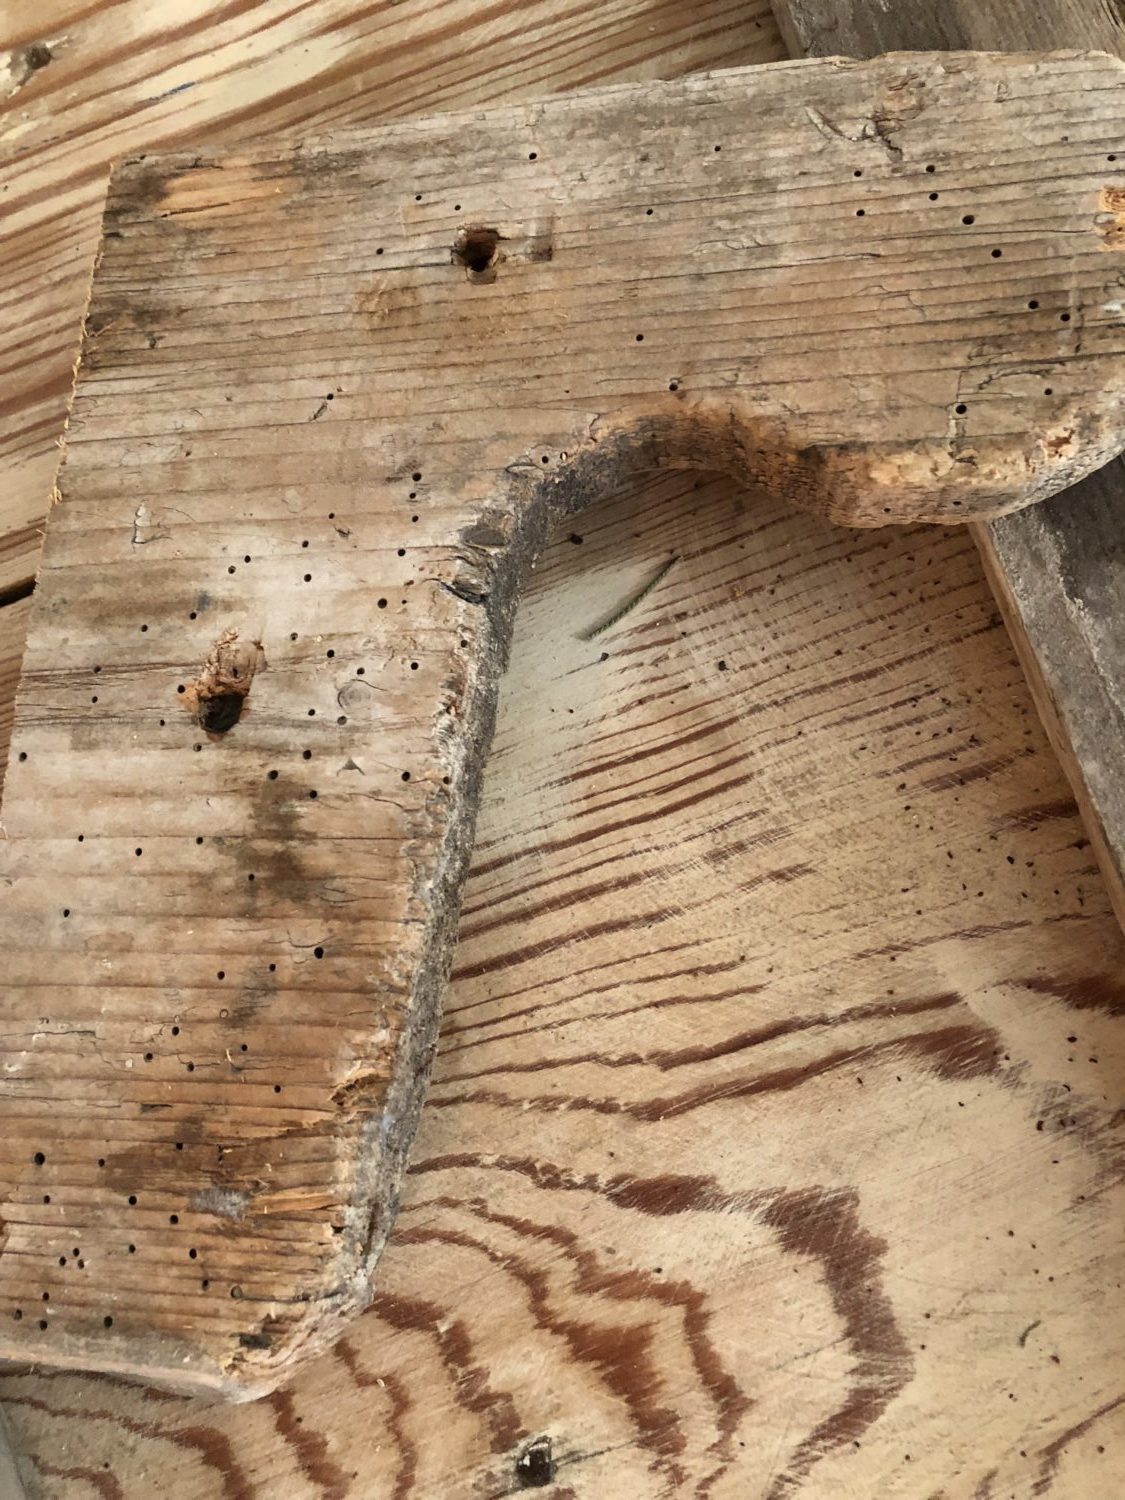
Next, we took apart the vintage trough, with an idea to use the curved pieces as part of the trim. This is a very old piece, so we were careful to keep from breaking the wood or nails.
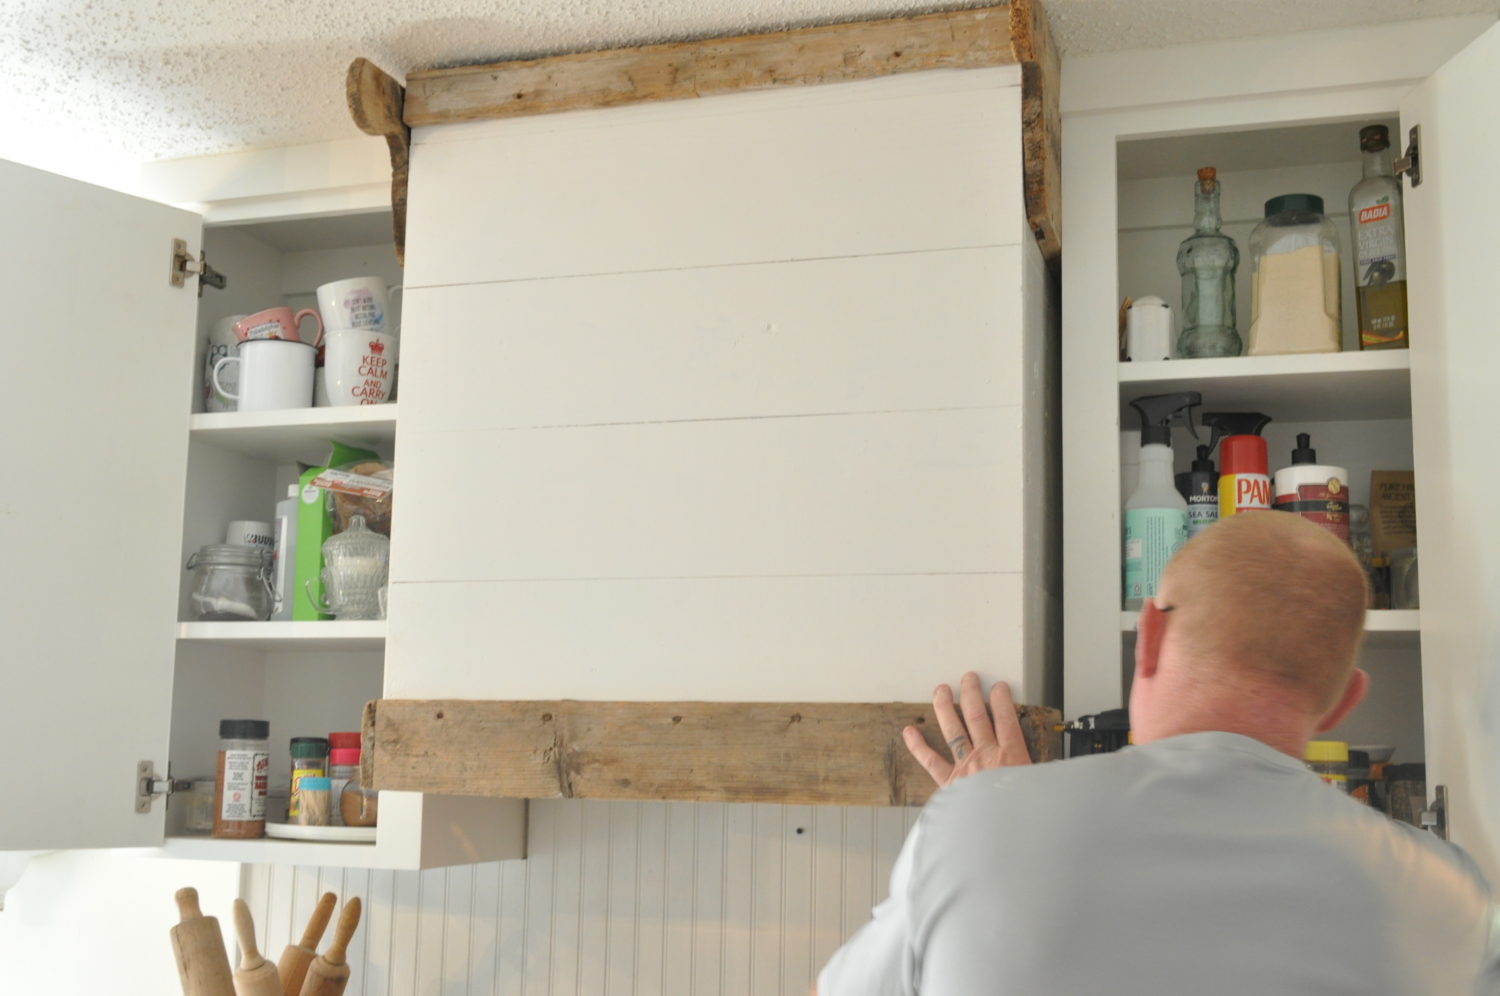
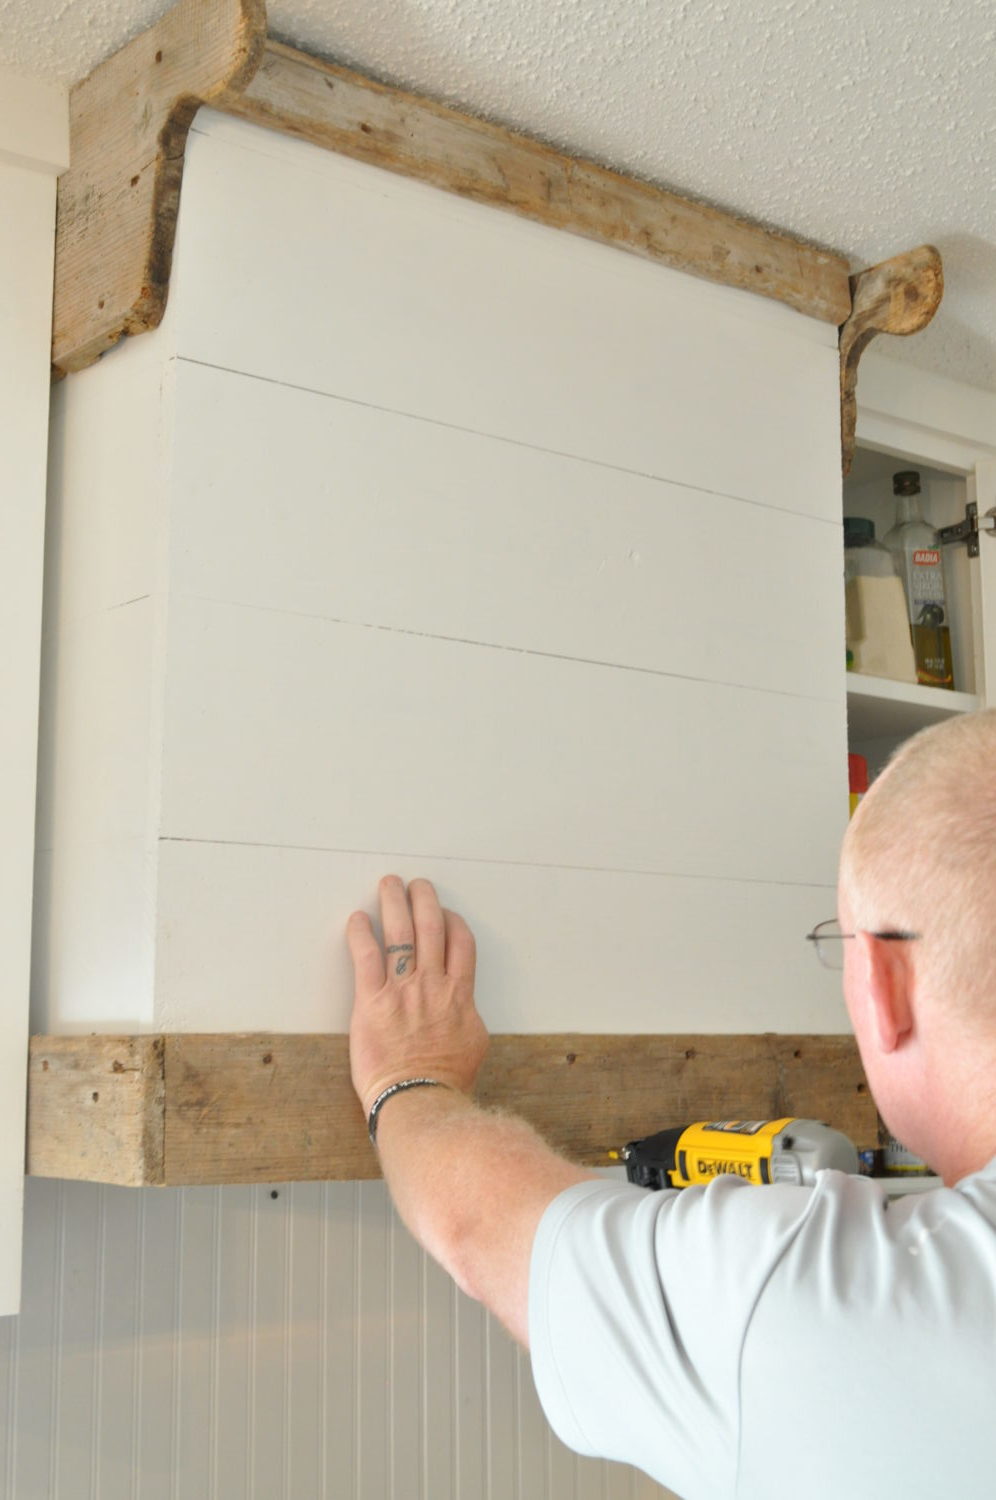
Instead of a slanted structure this time, we wanted to make a box shape…so, after Shannon built the box structure with 2x4s, he cut shiplap boards for the sides. Unlike the first vent hood, this time we were having to work between the two side cabinets. This limited our working space, which made it difficult to get into the small area. Also, can you tell that our ceiling is slanted? This makes for crazy angles! Yes, we did have to cut and re-cut some boards :/
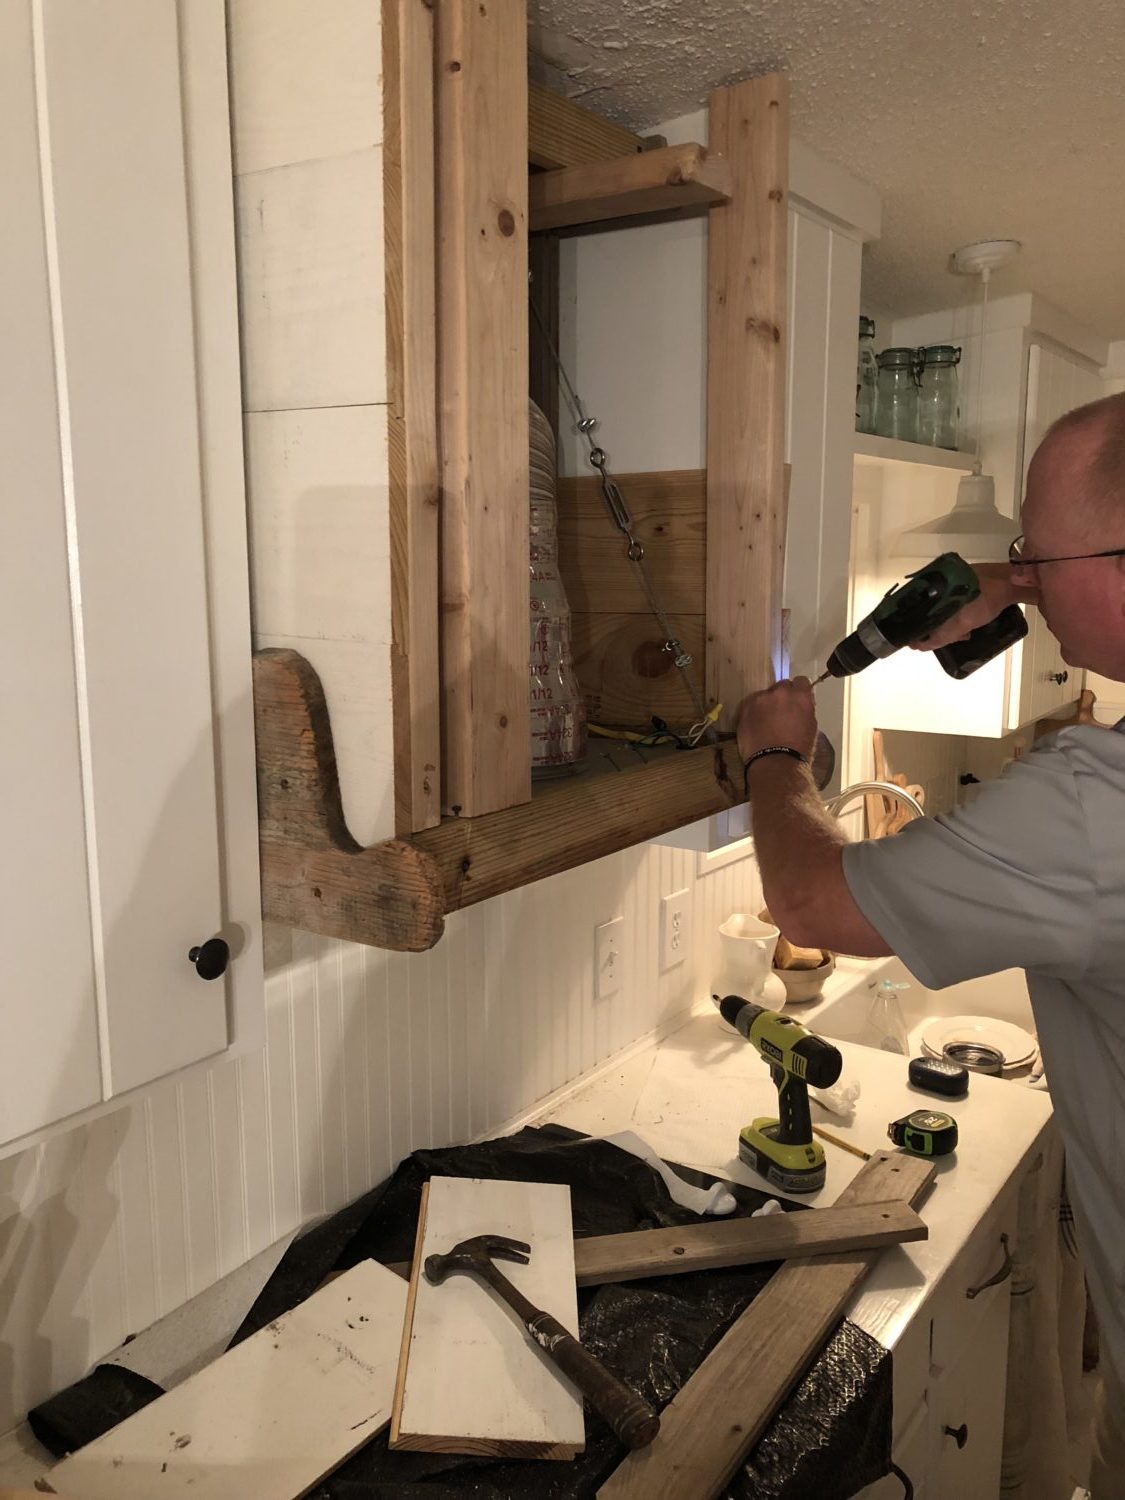
Then we added the shiplap to the front to close it in…it started to take shape! We were careful to use a level and be sure the sides matched up with the front lines. We inserted the curved pieces at the bottom sides, thinking that would be a good look, but we later changed our minds :/

And to finish it out, we used an old slat at the top front, because we wanted trim to cover this section…plus it’s way easier than cutting a shiplap board longways.
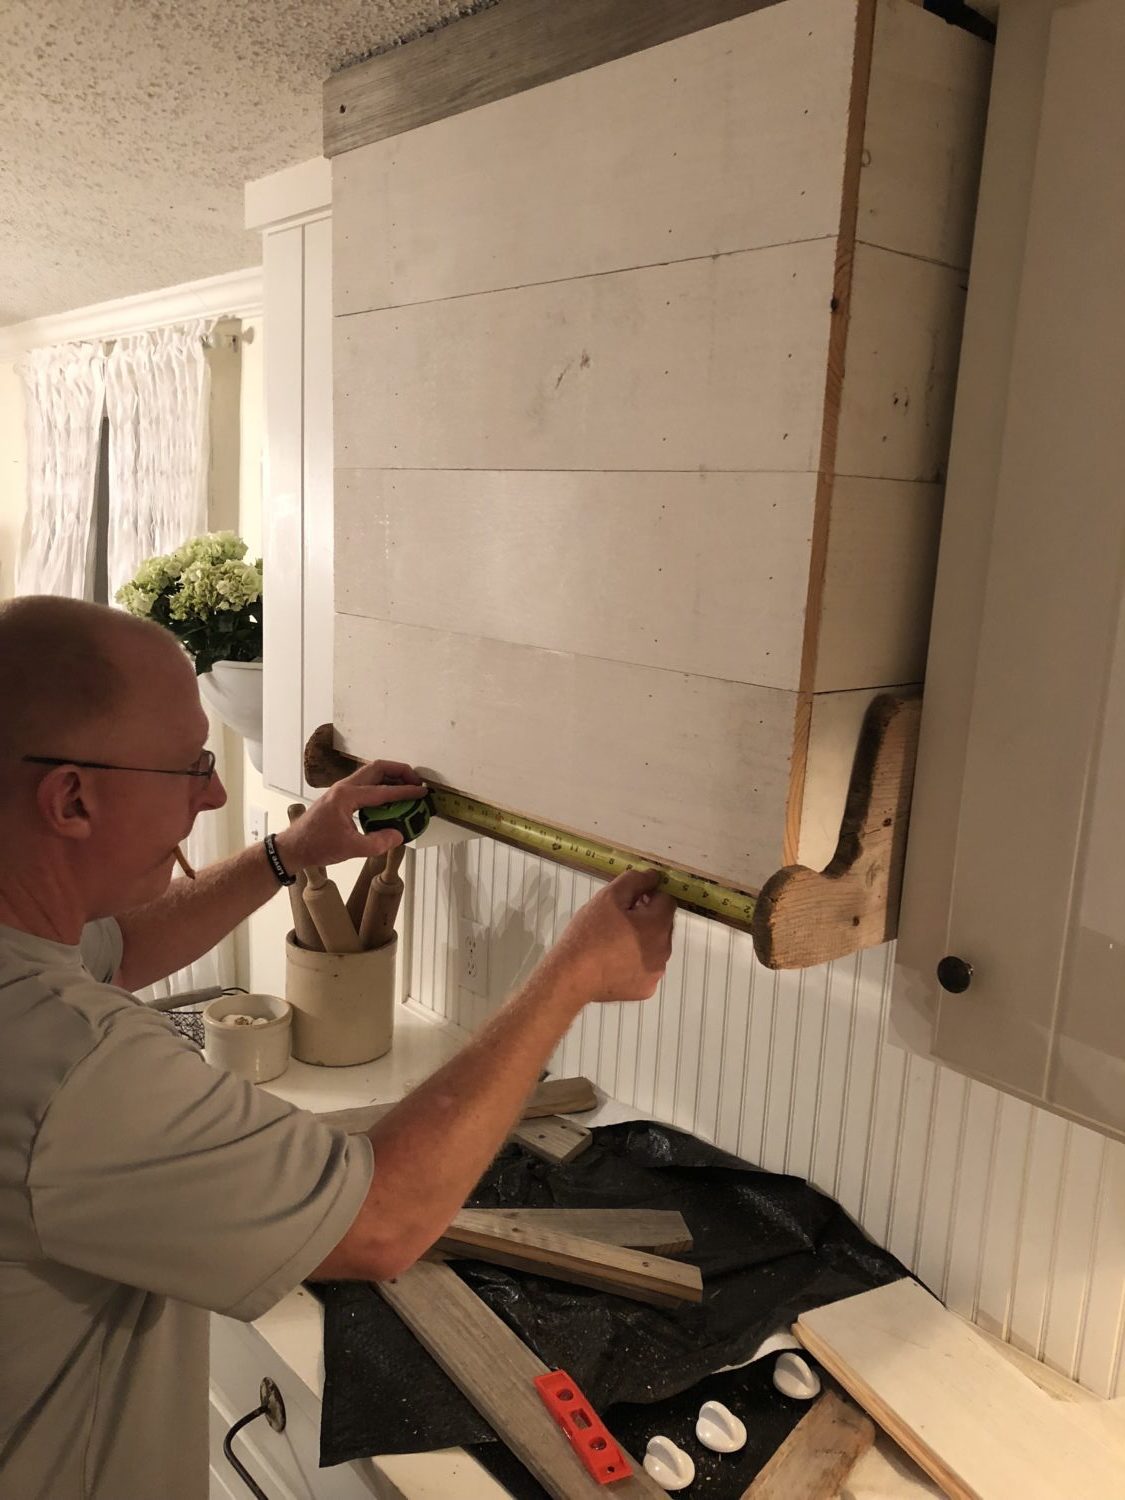
We needed to paint the hood and decide which parts of the trough to use as the trim. And then it hit me! Let’s move the bottom side pieces to the top! They can stick out further, and it would look way better.
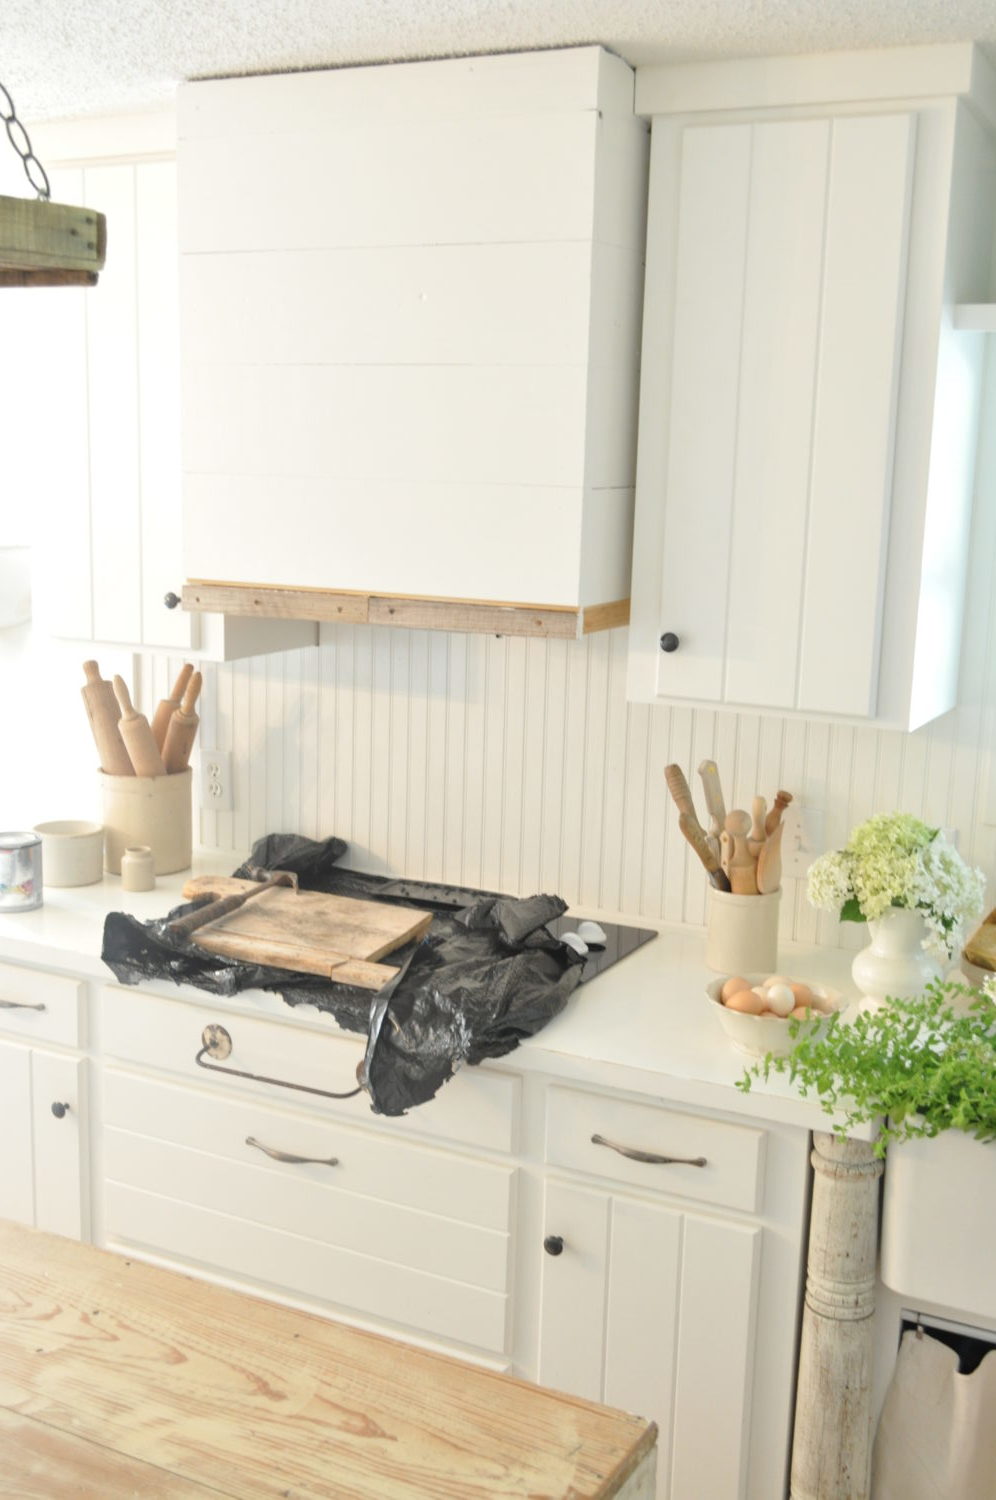
So, we removed the bottom trim and I painted the hood in Valspar Reserve Stain Blocking Paint in Bistro White.
Our cabinets and countertops are also painted in Valspar Bistro White.
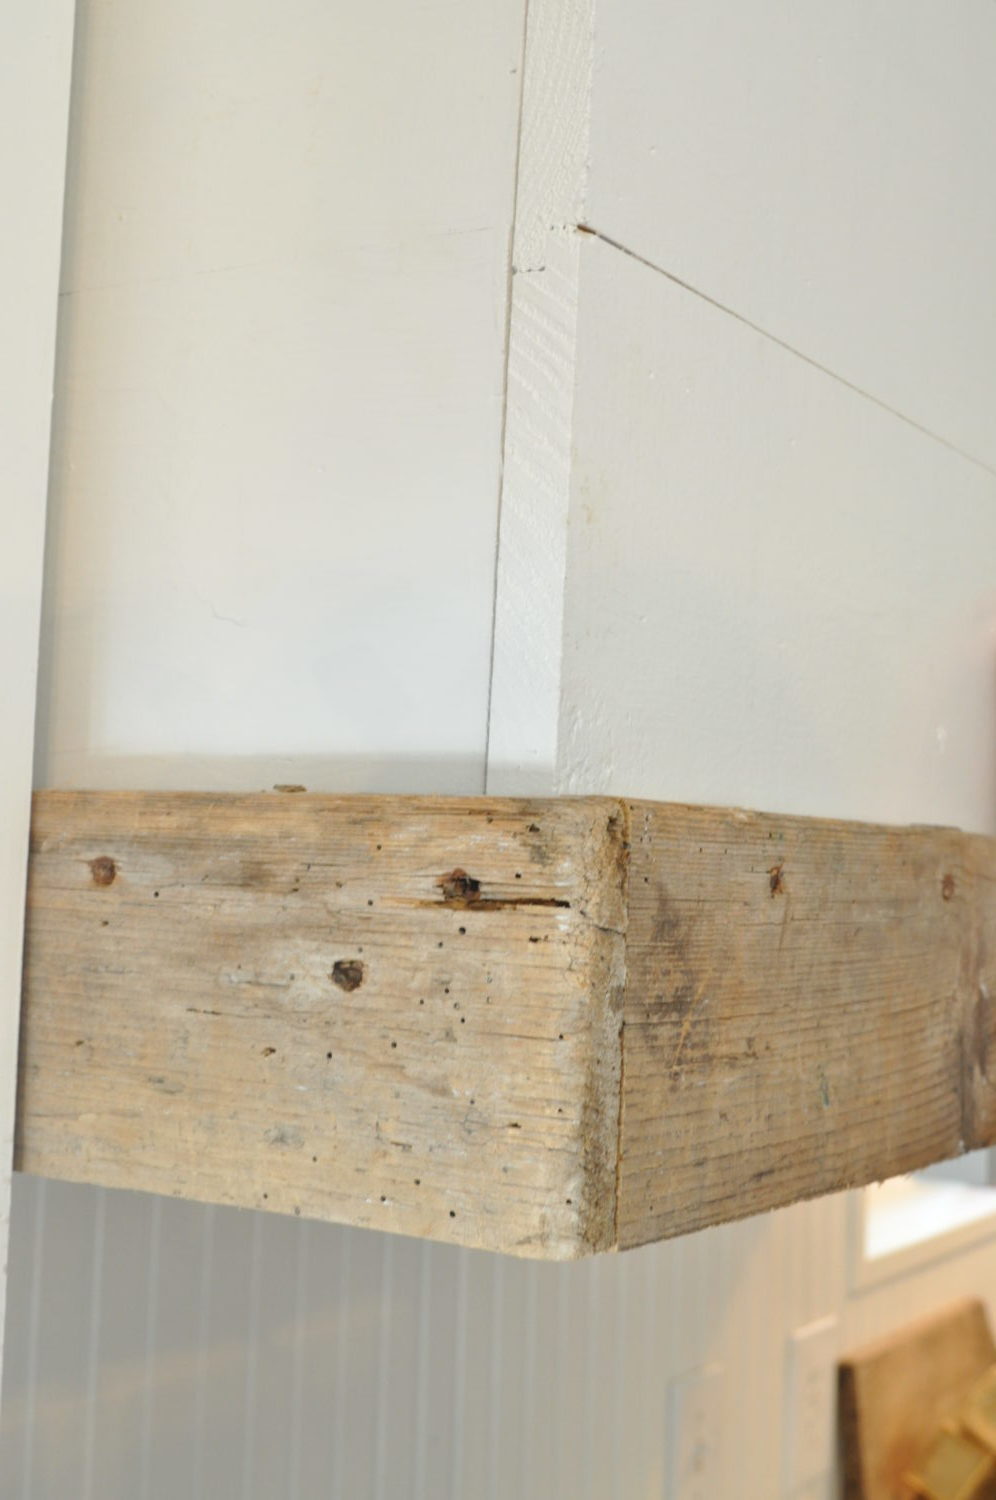
Next, we added the trim to the top of the hood, placing the curved pieces on the sides. We positioned them to stick out further for a little added character. Then the top middle trim was used from the sides of the vintage trough. It has a few little grooves already, adding even more detail. That’s the great part about using reclaimed wood, all the details and character that you don’t have to create…however, the hard part is that the wood is usually warped or uneven. This makes for a difficult situation when measuring and cutting. We measured twice, and even worked on “practice pieces of wood”…and still there are places it didn’t line up perfectly. We’re ok with that, because we enjoy the imperfect vintage style it creates.
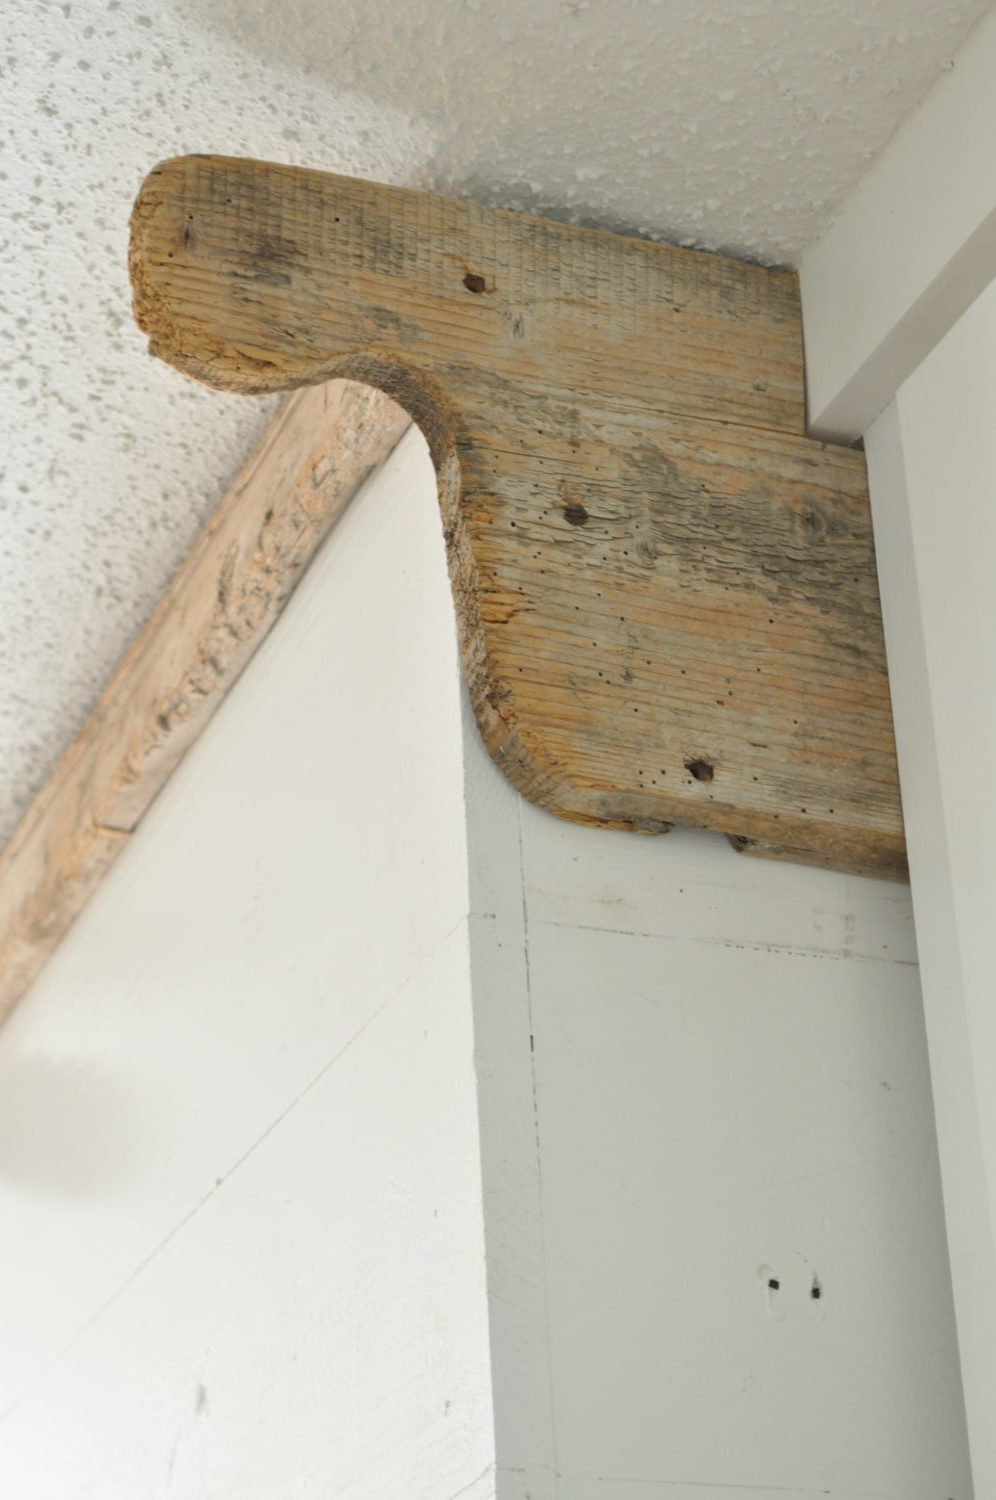
Since the top was quite ornate, we chose to make the bottom trim more simple. We used the bottom of the vintage trough in a 4 inch straight edge. And I was squealing with excitement! I knew as soon as he nailed the first piece that this is what I was trying to create! Sometimes it just takes a small process of moving pieces around until it becomes your vision 😉
Another cool thing about this reclaimed wood, is that it has the nail holes and a beautiful patina. No need to stain it! And yes, I’ll seal it with a coat of clear wax. This way it can be wiped down.
Also, we use this great nail gun… Dewalt 18 Gauge Nail Gun Click HERE
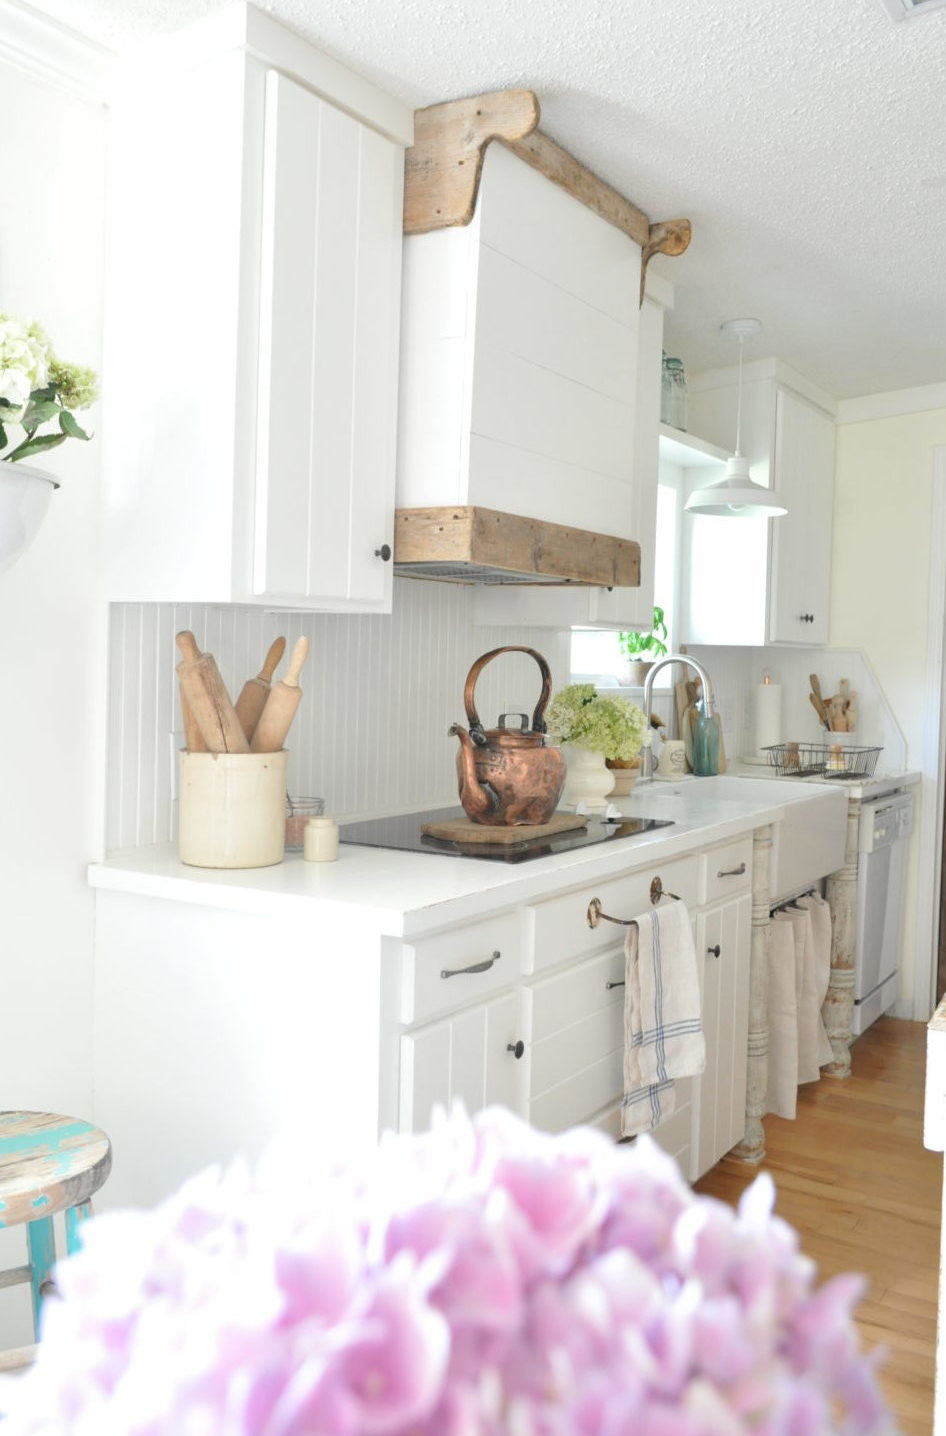
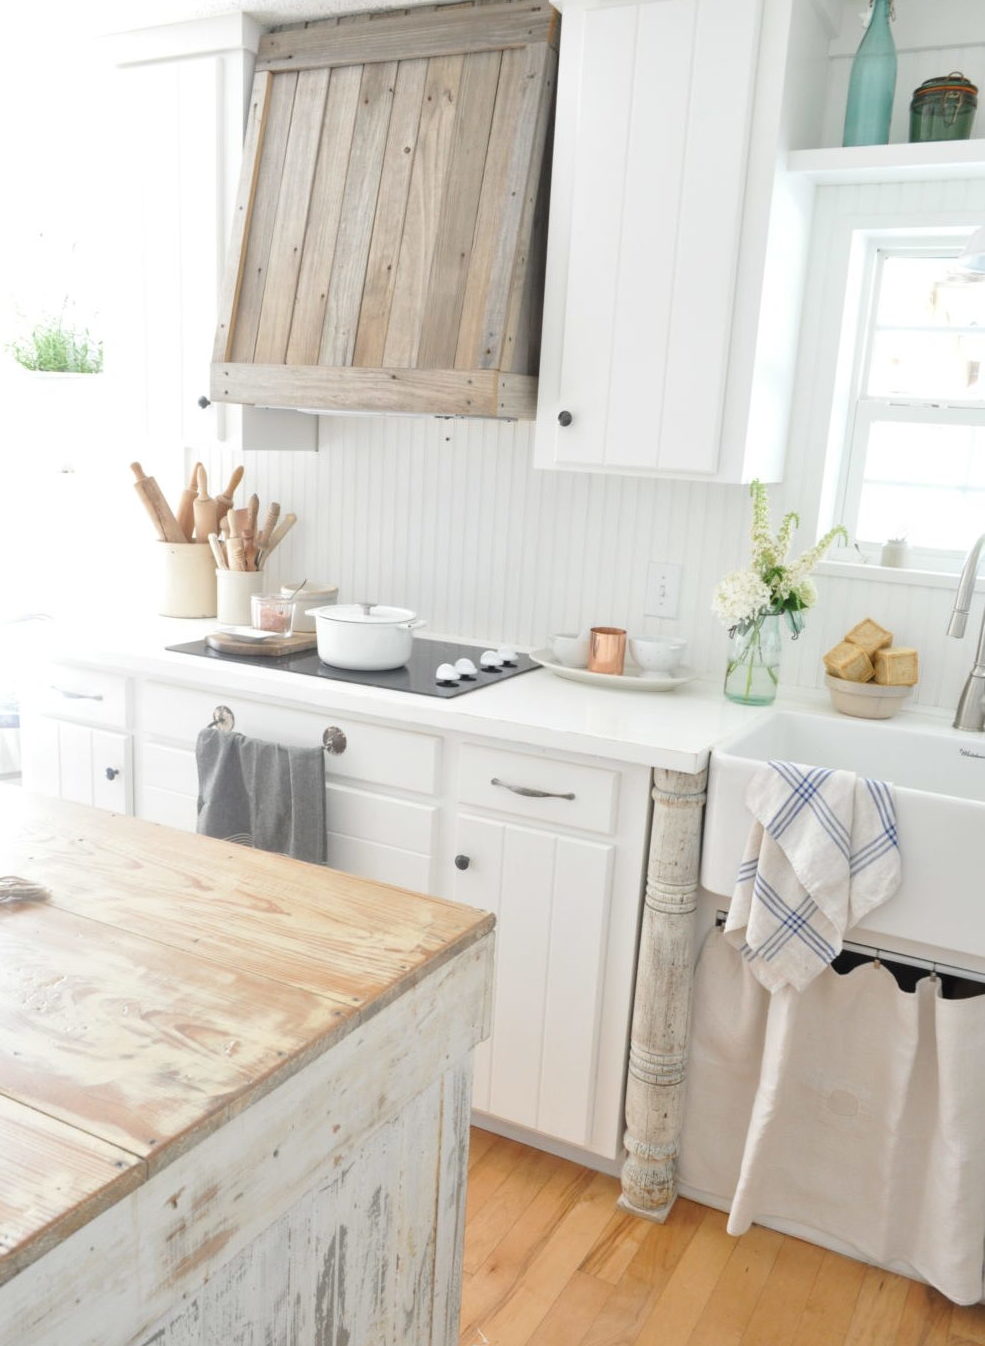
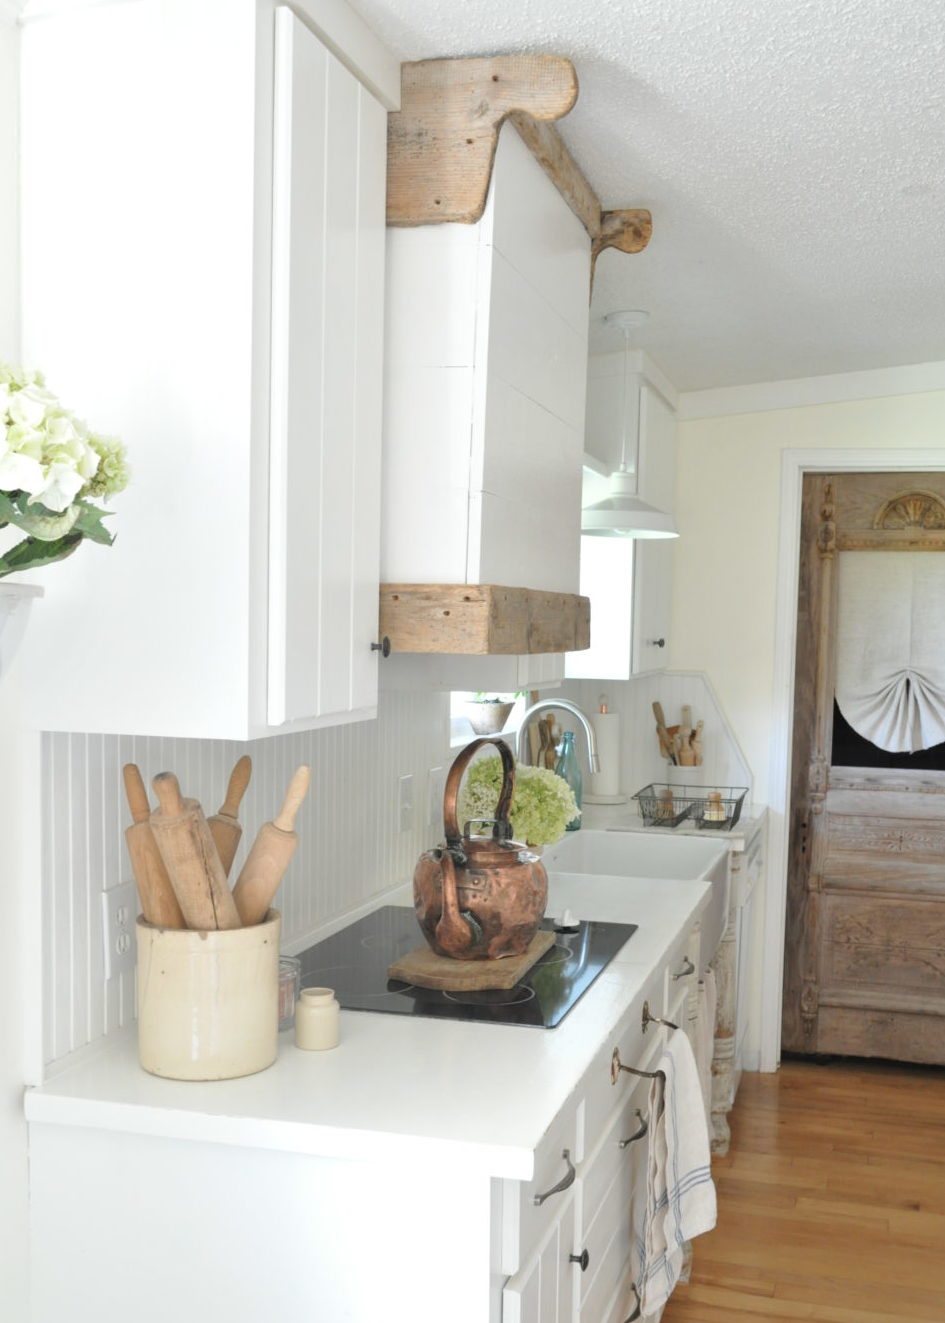
And there you have it! Our new custom, rustic, French country, farmhouse style vent hood 🙂
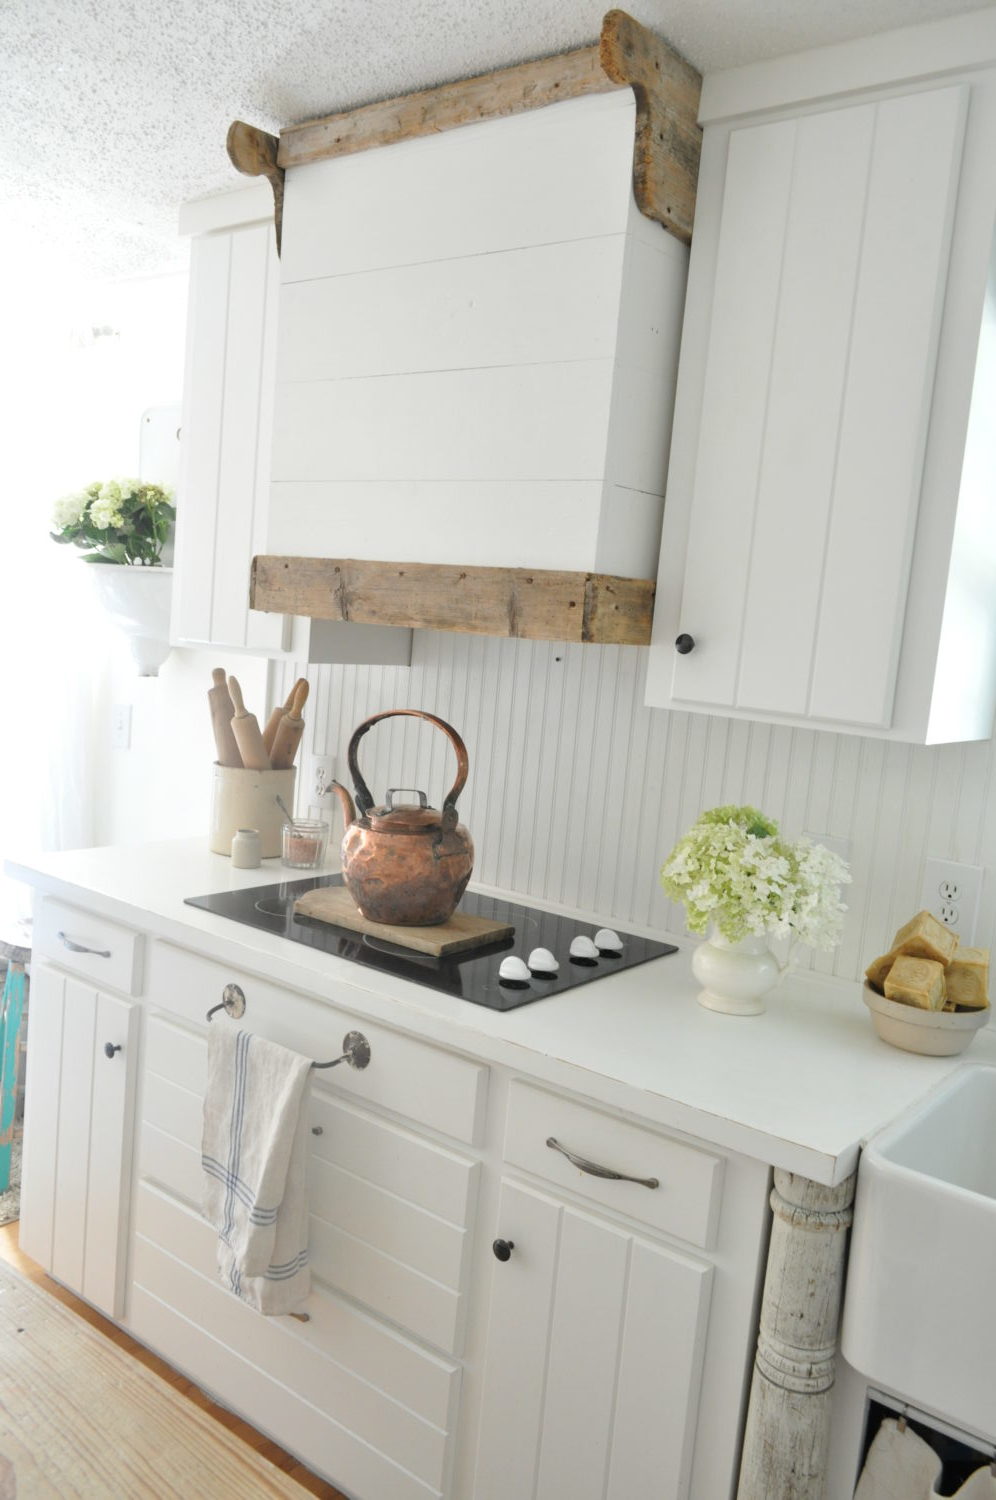
Yes, it is a much more simple, clean look, compared to our last hood. And I’m so excited to have a change!
And, please tell me what you think about it…leave a comment and let me know! Thanks so much for stopping by my blog today! It means so much to me that you come here to visit! I am sending lots of hugs to you!!
What do you think our next project will be? A garden shed? A headboard refresh? A popcorn ceiling redo?
Please follow me HERE on Instagram where I share home decor ideas daily!
Blessings to you!
Becky C
It looks absolutely beautiful…sigh…
This is so funny to me! I have had your original vent a hood pinned on my Pinterest for so long. We are currently renovating our kitchen. Right now, I have nothing but a fridge and stove on the floor and the walls are back to the studs. While determining the cabinets, I returned to your vent a hood to learn how to build it and I read you changed it. Then I read you go to Canton. I live near Canton. Small world !!
Hi, i am in the process of trying to create a similar shiplap hood. Can you please tell me the width of your shiplap as well as the reclaimed wood piece?
Great job! It looks beautiful! Liked it!
Wow! This looks so nice. The last version was nice too though. Why is it so hard to find pretty styles of range hoods? Either you have to build it custom or they’re crazy expensive. Great job here!
I delight in, cause I found just what I used to be looking for.
You have ended my 4 day long hunt! God Bless you man. Have a nice day.
Bye
Shiplap vent hood looks stunning! Adds rustic charm to the kitchen!